This is not a project blog, meaning that I don’t want to write a lot of photo-heavy step-by-step posts about how to build things. There are enough of those out there already. Some of them are very good. It isn’t my thing, and the bases, mostly, are covered.
Occasionally, though, a project requires my working through a process that I have not seen explained elsewhere, and I’d like to write it down for my own understanding and reference… and if I’m going to do that much, I figure someone else may benefit from my experience.
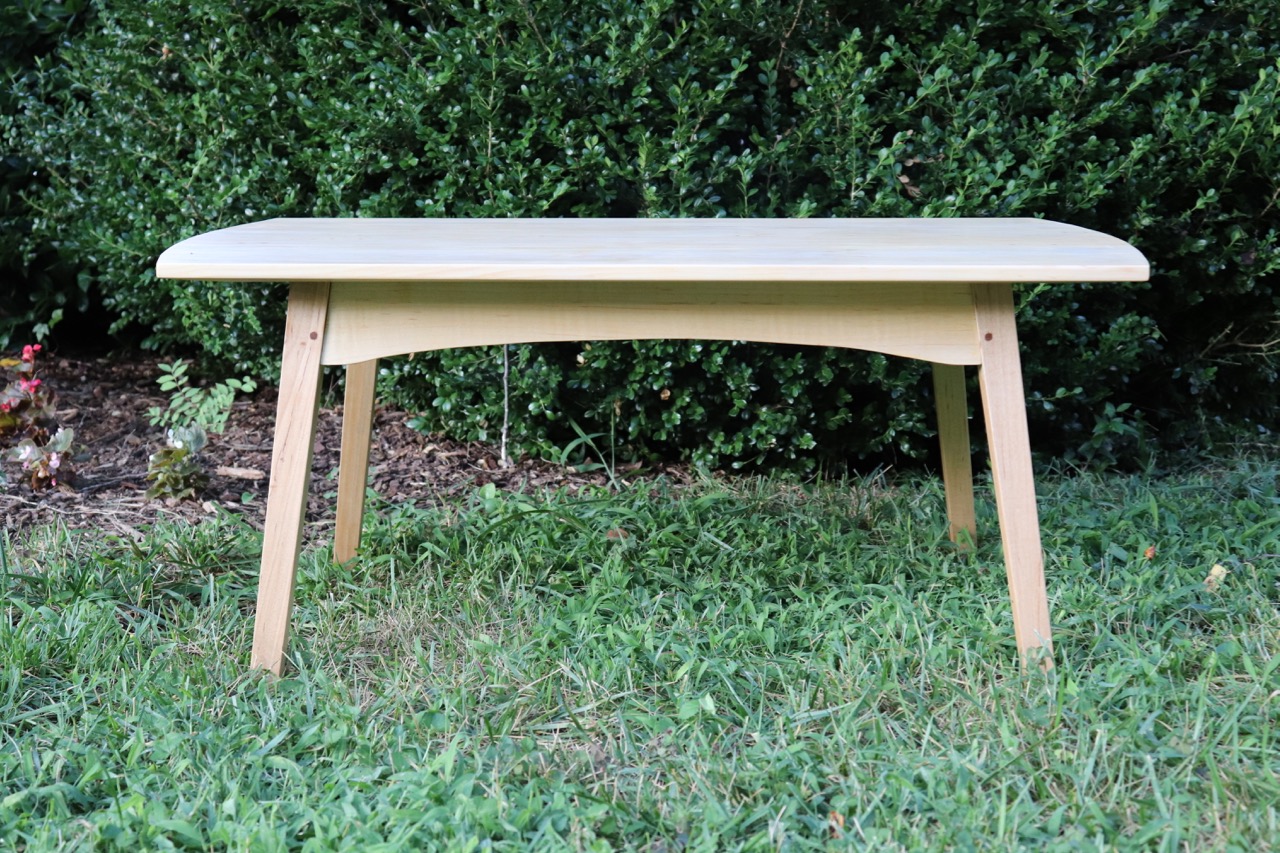
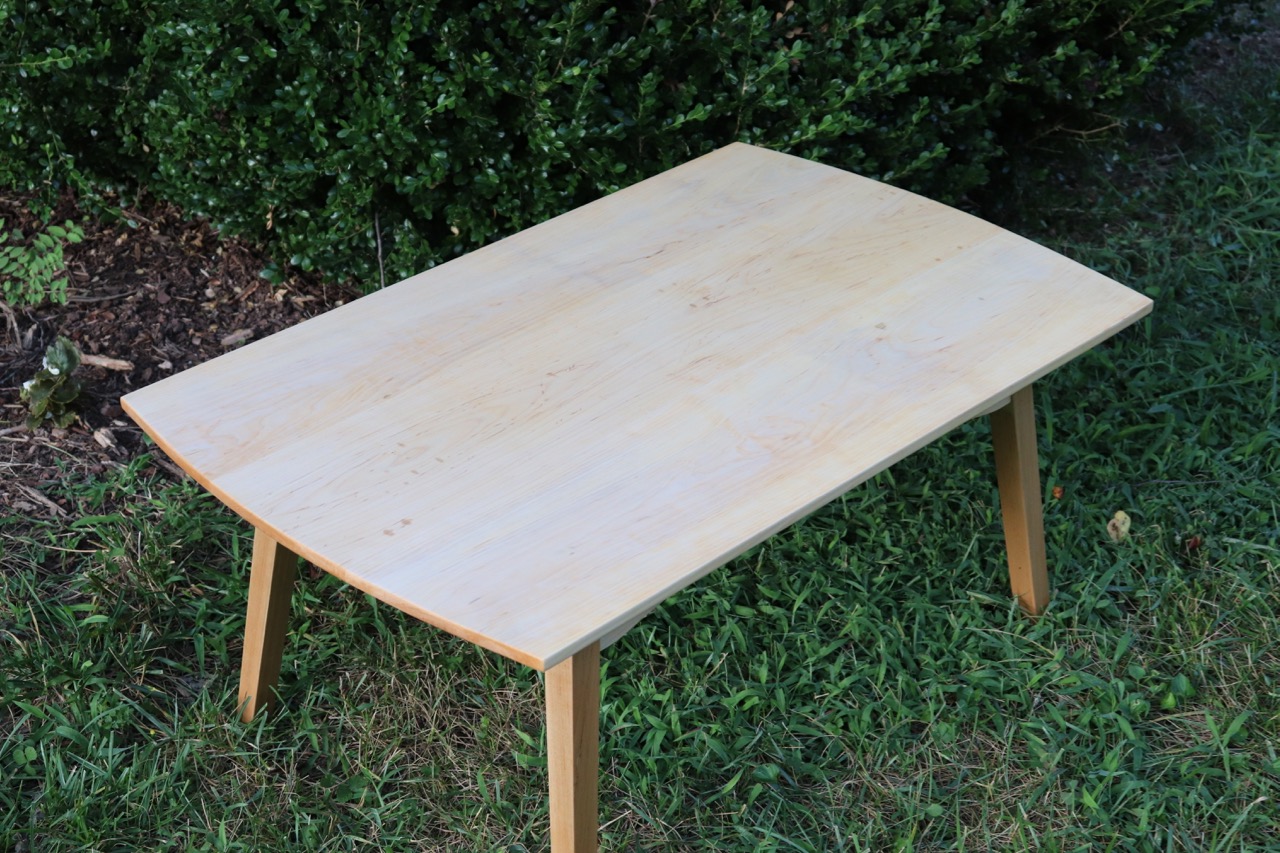
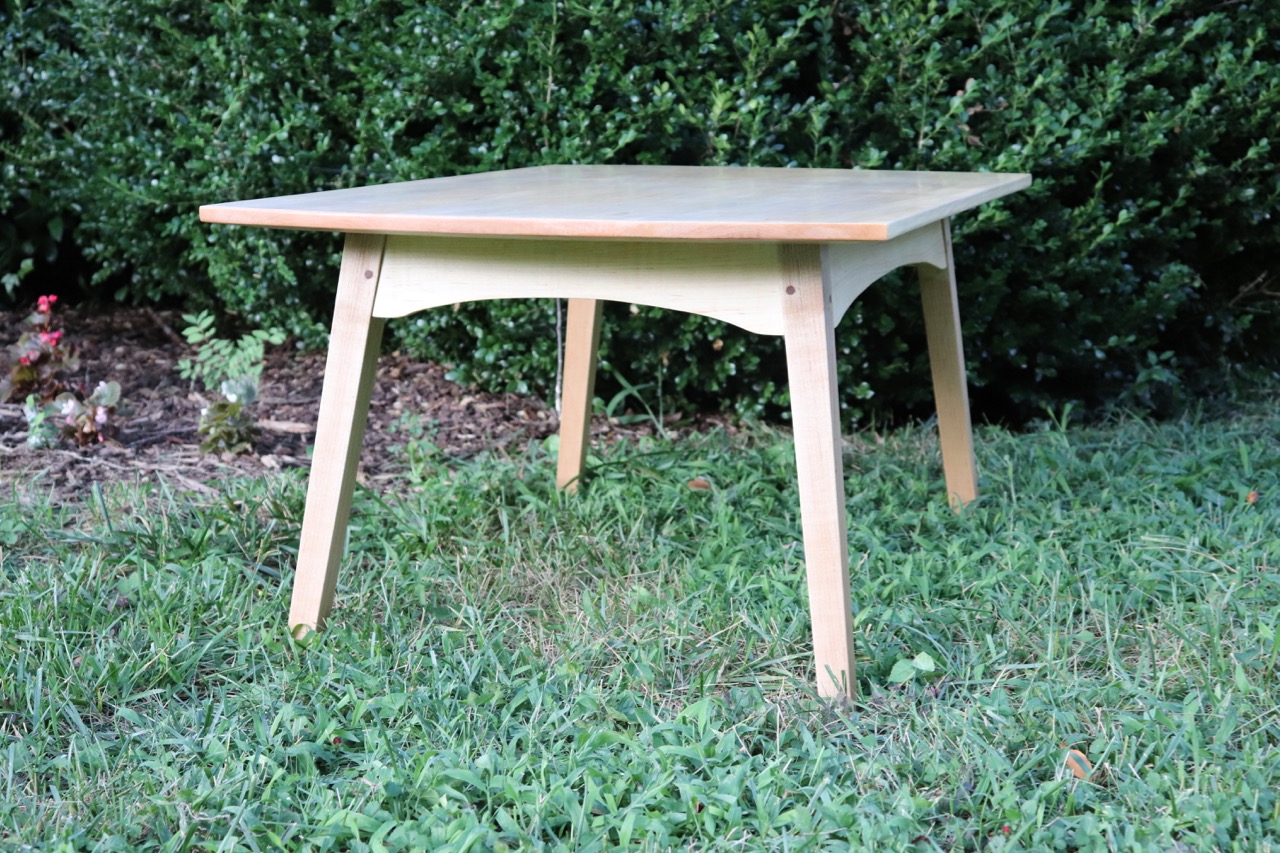
This table is one such project:
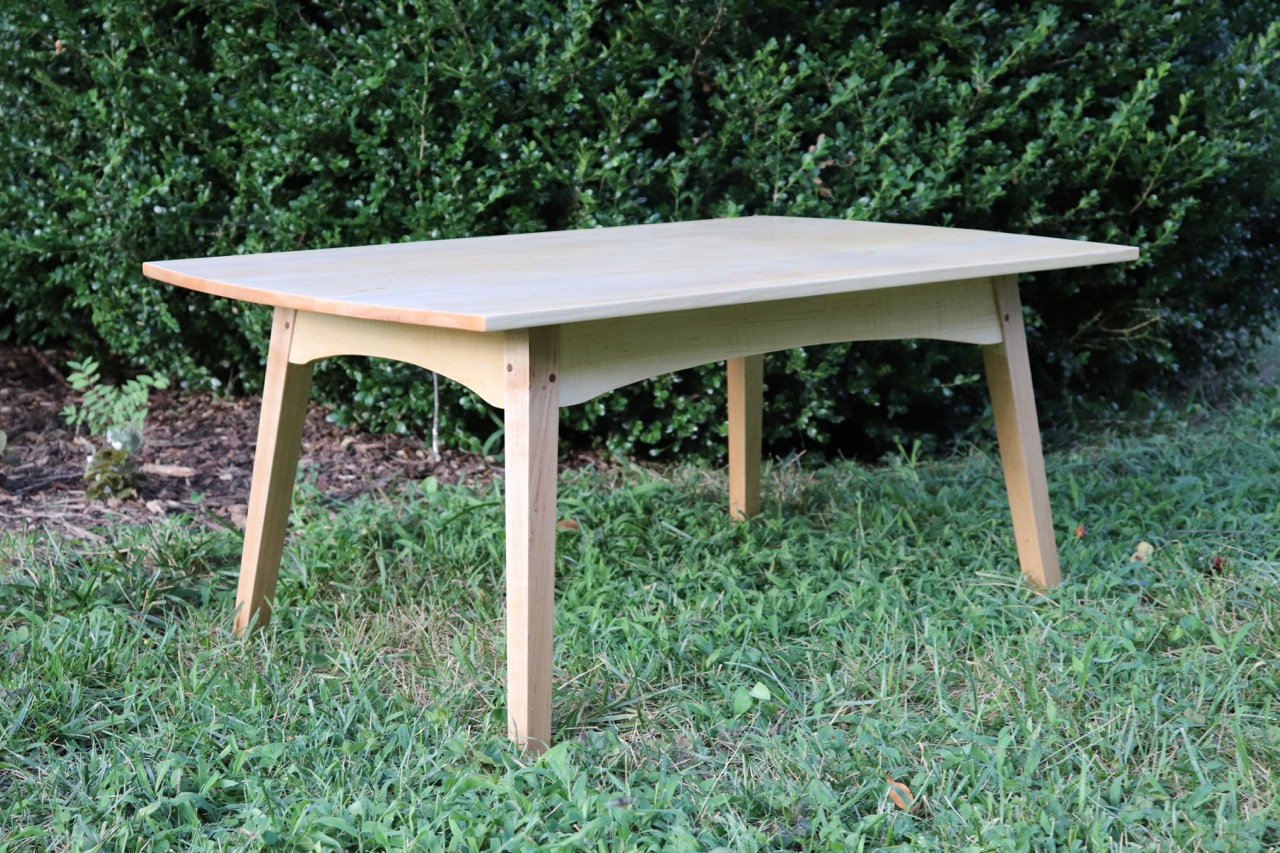
While there are some good articles available on building a table with splayed legs, they’re written for machine work. Since I work almost entirely with hand tools—I don’t own a drill press or table saw—most of the advice, and indeed even the process, in such articles is useless to me. Here, then, are ten things I learned from designing and building a splay-legged coffee table.
First, I am assuming that you can build a basic four-legged square table with straight aprons. I’m not going to explain mortise and tenon joints. Nor did I photo-document every stage of the process; I was too busy trying to build the thing. If Fine Woodworking wants to pay me to build it again and write it up (ha!) we’ll talk.
Ready? Here we go.
1. Design is hard. I knew this, of course, but when you throw off one basic thing about a piece of furniture (e.g. the angle of the legs), everything else has to shift as well, and sometimes has to be rethought from scratch, or the result looks jangly. And you have to keep in mind the odd ways the angles will move the joinery around. I started with a photograph in a book of antiques of an early 19th-century side table; got a couple of ideas from a Jens Risom table that was, while too architectural for my taste, almost the only splay-legged coffee table I could find that looked, y’know, right; then put it all away and went through a lot of pencil lead and graph paper.
To gently (I hope) emphasize the splay, the legs are subtly tapered and the aprons are arched underneath; the tabletop projects significantly so that the legs don’t stick out from under it; and the curved ends of the tabletop echo the aprons and make the top less, well, rectangular. I think I got it about right; all the pieces seem to fit. If I built it again I might thicken the legs at top to emphasize the taper, and (see update, below) I’d make the aprons a bit wider, so you can see that arch more easily when you’re standing halfway across the room. That’s a hard thing to gauge until you build the table — and in fact I designed them to be a quarter inch wider, but didn’t follow some of the advice I give below, because I had to learn it by screwing it up.
2. Don’t fear the compound angles. To splay the legs not only means that the aprons meet the legs at an angle other than 90°; it tilts the aprons outward at the bottom and creates compound angles that pull at the mortise and tenon joints. To see this, take a rectangular block and set it on a table. Now tilt it towards one of its corners. Note that the sides of the block are no longer perpendicular to the tabletop. If you look straight down on the tilted block, the cross-section is not a square, but a diamond, and the more you tilt it, the diamondier it gets.
I read a couple of articles by woodworkers whose work, writing, and teaching I respect who ignored this fact either passively or pointedly, and I concluded that it must not cause a problem for small angles, because their tables looked great even without accounting for three-dimensional geometry. But their tables were taller and had only a 4° splay; I wanted 8°. So I worked through the trigonometry by hand and found that the error introduced by my greater splay would still be less than a degree. No worries.
So yes, splayed legs do introduce compound angles. But for any reasonable splay, you will not see the effects.
Nevertheless…
3. Play with blocks. Spend some time holding pieces of scrap wood together at various angles to see how things get twisted and turned. Try to lock this into your visual memory so you won’t be surprised when you actually build the thing.
4. Taper the outside of the legs. The legs on this table are tapered. Ordinarily, I’d taper the insides of the legs below the apron, to give them a slightly splayed look. Tapering the outside makes the table look dainty, like it’s on tiptoes. Here, with no square reference for the eye, you can taper either side. If you taper the outside, the taper can run the full length of the leg, which I think looks cleaner.
Note that when you taper the outside of the legs, the lip where they meet the apron will be tapered. It will look fine, just leave yourself enough of a lip (I like 3/16") to cover it. If you want the aprons flush with the legs, you’ll have to plane the aprons as well. Considering that prospect, I decided that shadow lines give a piece interest.
Either way, don’t taper the legs until you’ve fit all your M&T joints; it will be easier to chop the mortises perpendicular to your benchtop, and you won’t get confused about which angle is which. And speaking of which…
5. Angle the tenons, not the mortises. The apron meets the inside of the leg at, I think, 98°, which means that either the mortise or the tenon has to be cut 8° off square. There seems to be some debate over whether it’s better to angle the mortise or the tenon. The argument for the former is that angling a tenon makes it less strong. That may be so, but surely not to a degree that’s going to cause a table to break under normal use; I know it was done historically (though not exclusively) for joints in upholstered side chairs, which get a lot of abuse. What’s more important is how you’re actually going to make the joint. I suppose if you’re cutting mortises with a drill press you can dial in any angle you like, but if you’re working with hand tools it’s far easier to lay out the shoulders of a tenon at, say, 85°, than to pare the ends of the mortise off square, for the simple reason that you can see the shoulders of the tenon.
(It’s a different matter for the round tenon of the stretcher of a chair, where making the mortise is simply a matter of drilling a hole, and you can line up the drill bit as needed. In that case, angling the mortise is far easier than making an angled tenon.)
6. Use a bevel gauge instead of a square. In theory, cutting a tenon at 86° or 82° or 74°53′ is no more difficult than cutting a square tenon. Draw the angle with a protractor (or, better, keep it simple and use the rise and run from your drawings), set your bevel gauge, and use that instead of a try square for layout. If you set the gauge like a wonky T instead of an L, you’ll have both the angle and its supplement, which will cover all your layout needs. Then proceed as usual. Well, more or less as usual…
7. Make your layout forgiving and save fine tuning for last. In theory, it’s just like building a square table. Practice is another matter. The traditional (and I think most sensible) practice with hand tools is whenever possible to trim things flush once they’re assembled, perfecting them after you’ve done the donkey work rather than having to do the donkey work to perfection. Even in a square table, I always leave the legs long at the top until I’ve chopped the mortises, so I don’t split out the ends when I’m chopping, and cut them to length before assembly. In addition, I leave the aprons a good 1/16" proud at the top until after assembly, because realistically, something is apt to be slightly off, and it’s easier to trim the long grain of the aprons than the short grain of the legs.
With this table I found I wanted to take that principle a couple of steps further. Splaying the legs means that the aprons are pulled outward off square, and so you have to plane the long ends at an angle to meet the tabletop. You’ll want to plane the bottom edges of the aprons similarly so their undersides don’t show, and of course you’ll have to cut both the top and bottom of each leg at the same angle. I think it’s easier to finalize this stuff once the basic joinery is done and the frame is dry fit.
So here’s what I recommend, which is to say what I’d do if I were building this table again: Cut the legs about two inches long and plane them square. Using your bevel gauge, mark pencil lines for the tops of the legs about an inch from one end. Those will be your reference for your mortises. Now make a pencil mark where your mortises will go. Think very carefully about this step; it’s easy to wind up in M. C. Escher land. Hold the legs on your bench the way they’ll be when the table is assembled. Make the marks, go away, have a cup of coffee, come back and look at it again. (If you screw up, it’s okay; you can redraw the cut lines once you’ve chopped your tenons, but it’s easier to get it right now.) Then make parallel marks for the bottoms of the legs. Don’t actually mark out the mortises yet.
Cut the aprons about 3/8" wider than you want them ultimately to be. Lay out the tenons, using your bevel gauge, so that you have half that extra width at the top and half at the bottom. Note that because the tenons are angled up, you’ll need to leave the top shoulder longer than you ordinarily would, so that the mortise doesn’t wind up too near the top of the leg.
Now, using the tenons as a guide, lay out and chop the mortises square.
Then cut the tenons. Because I always cut the cheeks first (since they’ll show), marking the shoulders is a little tricky, especially when they’re angled. I found it easiest to saw near the lines and pare down with a chisel until they fit.
Once you have a solid dry fit, make sure the tops and bottoms of the table legs are drawn in the same two parallel planes and that the aprons extend fully above the lines you marked for the tops of the legs. If not, adjust your layout accordingly.
Saw the table legs to length. Reassemble and mark the aprons where they meet the top of the legs. Then mark the bottoms of the aprons from that line and plane the bottoms at the correct angle. If one of your M&T joints has migrated a sixteenth of an inch or so, you can fix it here, and no one will ever know.
Taper the outside of the legs, cut the curves under the aprons, and take care of any final planing and scraping (and sanding if you’re not religious about the hand-tool thing). Plane off the tops of the aprons after assembly.
8. Drawbore the tenons. I had drawbored the mortise and tenon joints on a frame for the back panel of a cabinet, and I’d done a couple of test joints in maple, but this was the first time I drawbored joints that would be visible. I was not crazy about adding another new technique to this project, but pounding in pegs is a heck of a lot easier than clamping a box that isn’t square. I did make angled clamping blocks for the dry fit, but they were unreliable; I find that anything not square wants to slide. (I know some people clamp pegged joints, but I can’t see the use; you can’t clamp tighter than you’ve pegged it.)
I decided there wasn’t room for two pins on each tenon in so narrow a leg, so I offset the pins on each leg, one on each tenon. Two would hold better, though. If you have some experience with this, please do let me know.
(Here’s Paul Sellers explaining how to make a drawbored M&T joint, and here’s some advice from Christopher Shwarz. Take your pick. Or Google it yourself.)
9. Don’t get too attached to tradition. I like wooden buttons for attaching a table’s top to its aprons. But those, too, would have to be cut at an angle, as would the matching grooves in the apron. I decided this would be a good time to try figure-eight fasteners (often called desktop fasteners). They were easy to install and seem to do a great job. As much as I like traditional methods, it’s a craft, not a religion.
(Here Popular Woodworking demonstrates figure-eight fasteners. Note that I installed them in the aprons, not the ends of the legs. Also, I found you can use a round-shank Forstner bit in a three-jaw chuck hand brace and it works just fine. This was definitely a low-speed operation.)
Finally…
10. Be gentle. Coffee tables are apt to be dragged across the floor, which will eventually weaken the joints between the legs and apron. The splay of the legs makes that especially true for this table. Mine is rock-solid and ought to endure several decades of normal use, but I’ve given the teenagers a speech about this: Don’t drag the table. Pick it up if you have to move it. Thank you for listening.
Update: On third thought, I would not change the shape of the legs. Making them thicker at the top would look weird. I drew it out that way initially and rejected it; I’d forgotten. So number eleven, perhaps, is to stop second guessing yourself!